My advent Window
My advent window.
I have previosuly leaked the existance of my advent window to my followers on Mastodon.
Today it went up!1
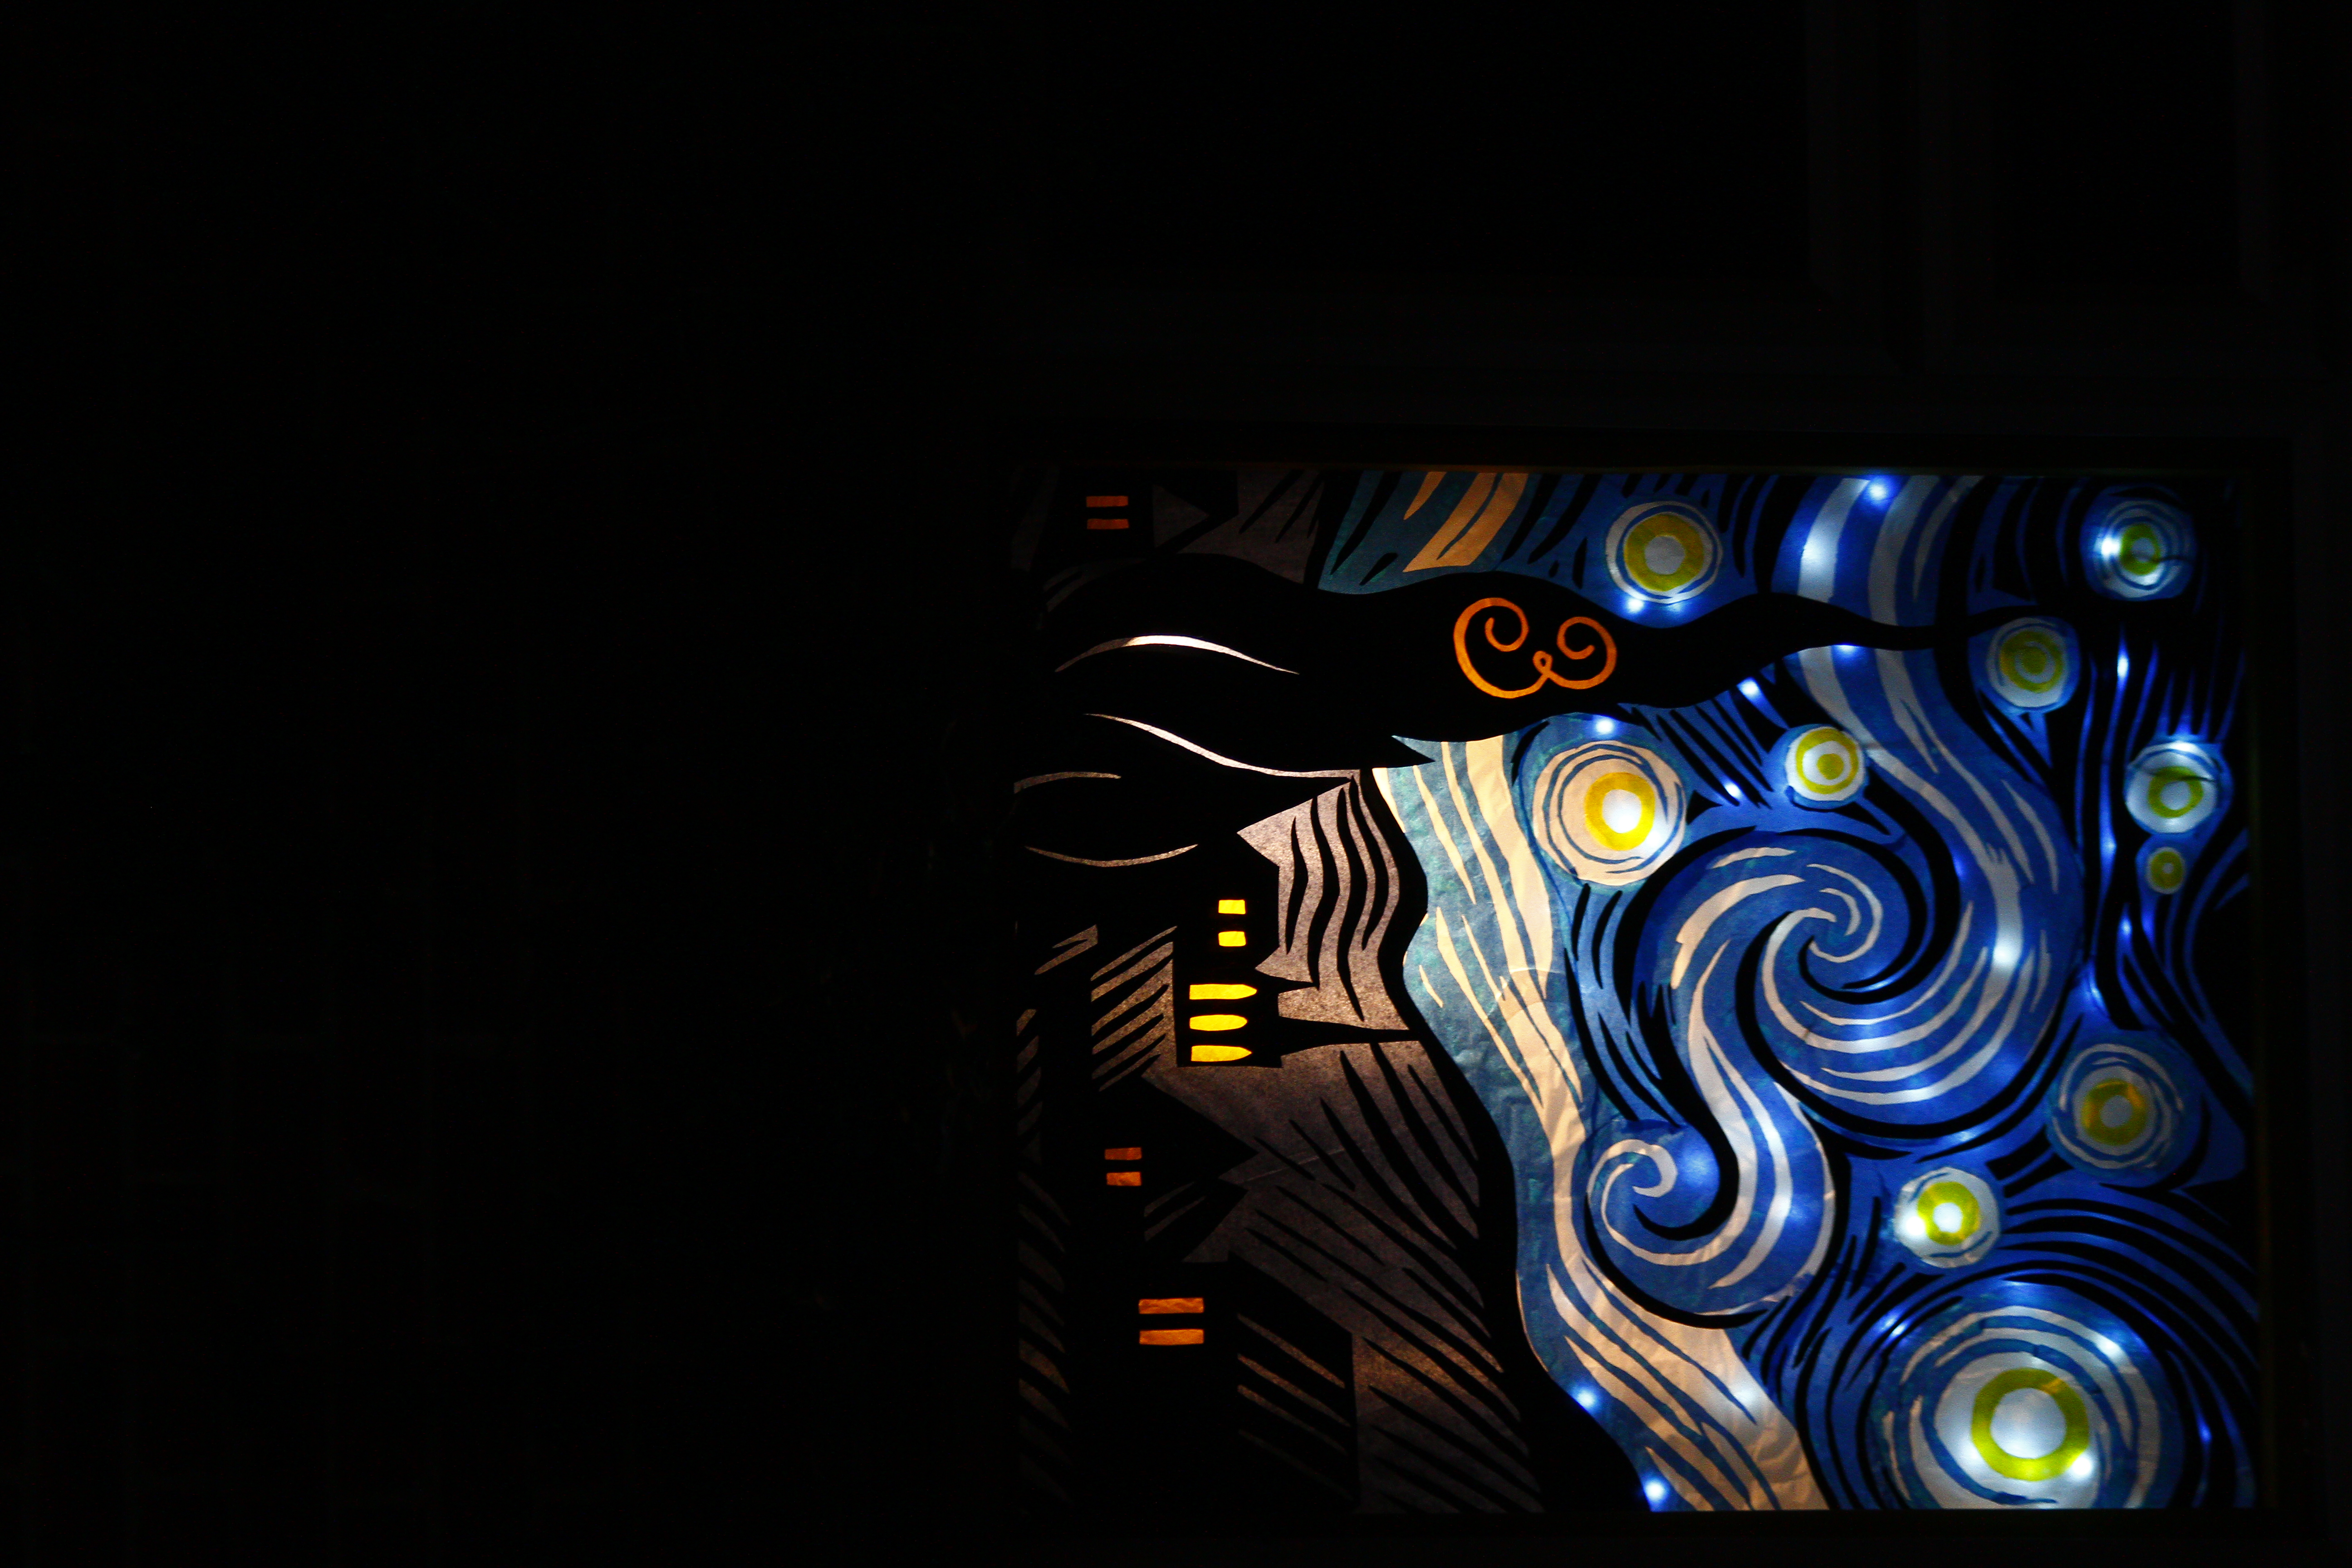
The advent window
Quick background on advent windows
The idea of an advent window is a display that is put up on your window on an assigned day of advent.
This is done on my road as a fundraiser for a local charity.
Advent windows are generally constructed out of either tissue paper and card, painting or placing ornaments/card displays in a window.
How I actually built it.
I have always used the first method of card and tissue paper - but at a far more complex level.
The first stage was to construct a wooden frame with an acrylic panel attached behind it. This was the first time that I have used such a frame. This helps to provide structure for construction. It also also sets the display back a few centimeters from the window - which protects it from condensation.
Planning
I print out an image at a 1:1 scale by tiling smaller images. This is then assembled and attached to the back of the frame. I then print out another copy, but do not fully assemble it. I cut out the sections that will become black card, to use as a template.
It is important to note that image selection is very important. I found one online, that met my criteria of having distinct black shapes, has relatively few colours and is easily recognisable as the intented design.
Cutting card
I used traced around my templates in yellow pencil, with the movement of the tape affixing the template to the card - to ensure complete coverage and a perfect copy of the shape. It is important to note that this does add some width to the image.
This card is cut using a craft knife (which gives more detail) and sharp scissors (which give better curves). This is then glued to the acrylic frame using the backing prinout as guidance.
The acrylic frame allowed for the use of a thinner card (as structural integrity is unimportant), which made the cutting significantly easier. This was a relief after last year’s window, which almost fell apart during construction due to the little amount of card used.
Personally, I found cutting the card very relaxing across the ~20hrs that I spend on it.
Then I removed the backing image.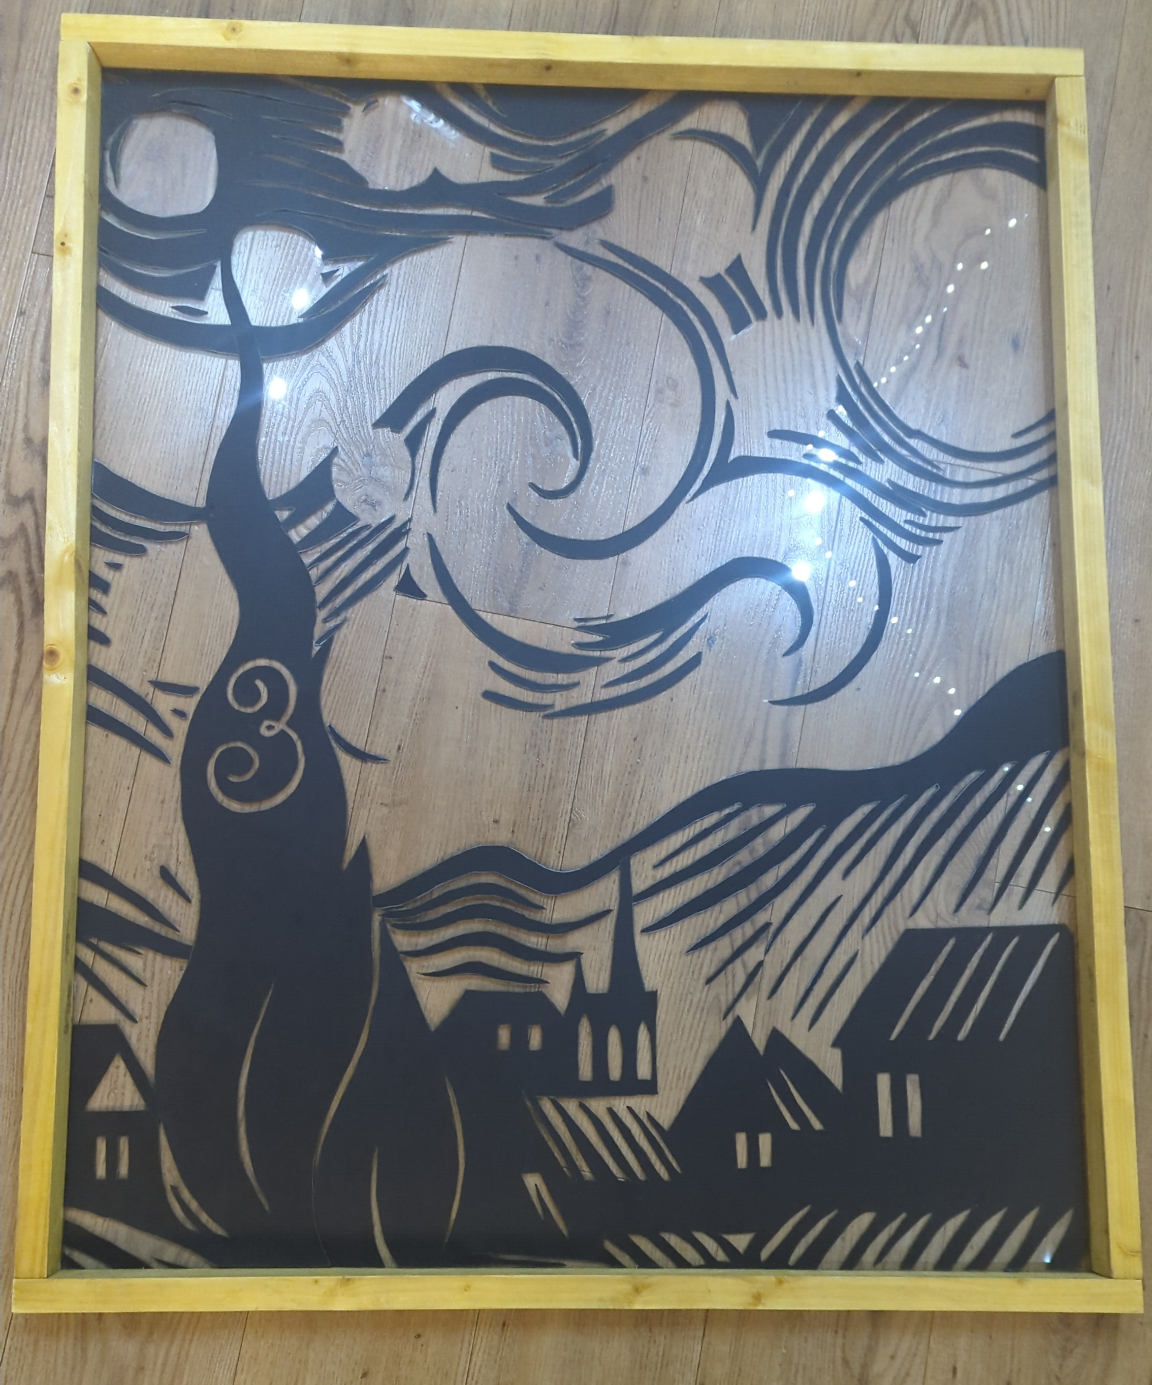
Without tissue paper
Cutting the tissue paper
This was an interesting process, with multiple different attempts initially. In fact, getting the top right sixth took about 4hrs!
To cut the tissue paper, I used the image that had previously been attached to the back of the frame and traced over the keylines using a very faint pencil. This was then also checked against the card frame. Where possible I made sure that the card would overlap with the black card to ensure that the seams were less visible.
To cut, I used very sharp kitchen scissors and nail scissors for detail work. I as unable to use the paper scissors and craft knife from before due to the required precision and risk of tearing.
As some tissue required layering, in some places I cut holes into the base layer (which for some peices was blue and for other peices was white) and then created sub-peices. Other times, and for sub peices, I used a base layer (this is what was generally used when layering onto white) and then glued smaller pieces on top. When glueing these peices together, I was used another pair of nail scissors (the first pair was needed for making running adjustments) as a glue spreader, this was needed to prevent rips as some of the peices of tissue were very fragile.
To attach the tissue paper to the card, I initially used careful checking and glueing to the back of the card (the card was on the window facing side of the acrylic and the tissue paper on the other side of the acrylic), this worked alright - but required much assistance and relied on ambient light to allow for accurate alignment. Later on, I decided to suspend the window (card down) on some chair with a light beneath and above it. This allowed for me to get underneath to check the alignment, whilst also being in position to attach the peices with only minimal movement. This was very helpful during the later stages of the construction of the window, but would not be of much help with the spiral in the middle.
This process was significantly less relaxing than the card and took about 16hrs.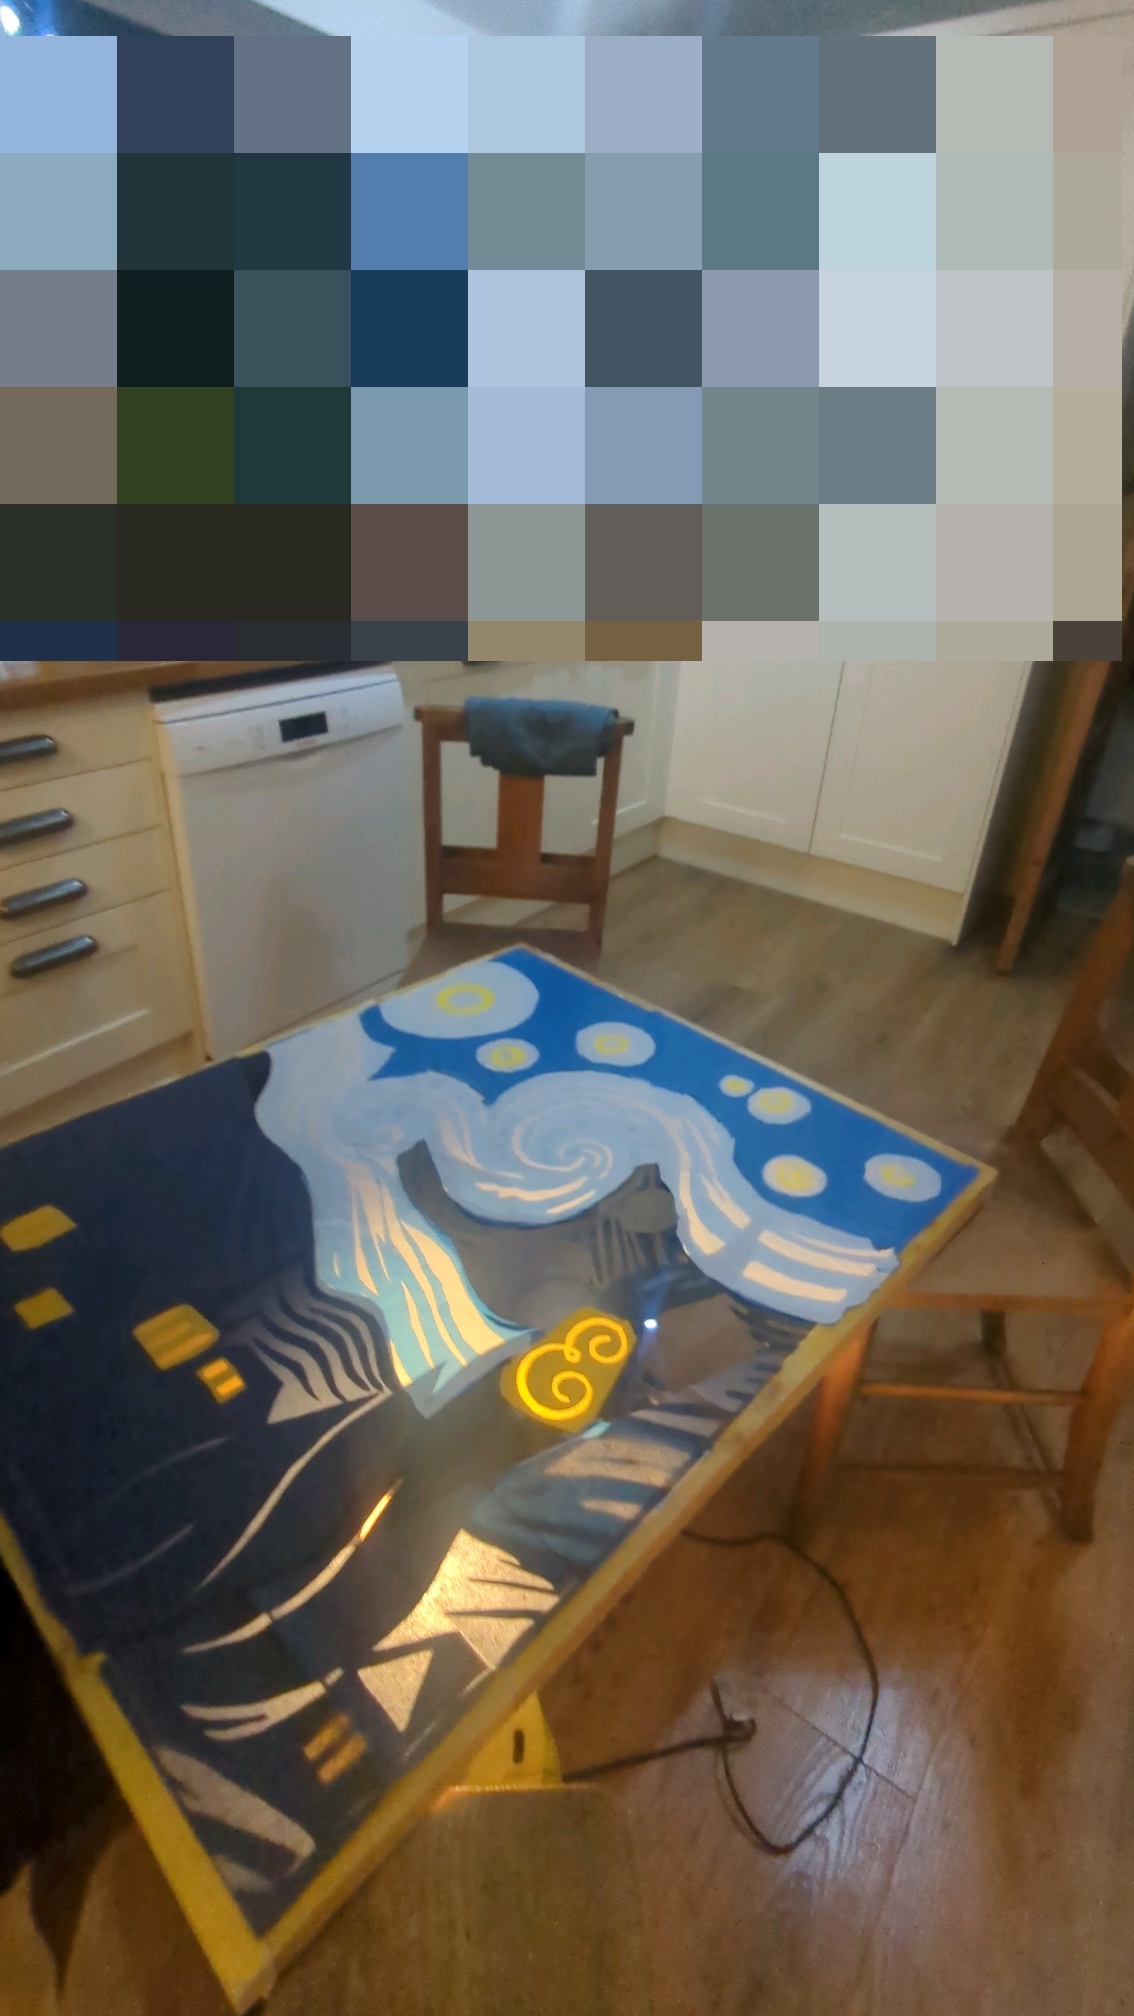
Window suspended on chairs
Damage
Unfortunately, the large circle in the top right was accidentally wripped off! This took some effort to fix, there was much patching around the edges of the tear, and the middle of the circle was wripped, which had to be removed and replaced.
While fixing the tissue paper, I noticed that some of the card was peeling off, which had to be replaced.
I used the method of suspending the frame on chairs and going underneath for card and above for tissue.
Lighting
This is one of the more important aspects of the advent window. Firstly, light leaks around the edge of the window need to be avoided. This can be sealed with tape (I use a combination of electrical and duck, as electrical gives no structural strength - but leaves no sticky residue).
A consistent illumination is also important, which is why I suspended some christmas chain lights using string and bunched them together using masking tape. These had a cool colour temperature, so were ideal for the stars. In the bottom-left corner, I used a light that was angled perpendicular to the window - which when reflecting of the inside of the curtains, creates an even illumination. The warmer colour temperature was useful for the windows in the bottom.
The lighting process only took about 4-5 hours.
Opinions
I thoroughly enjoyed making it, which is by far my best one yet. However, I know that others on my road will complete far more complex ones far better. :)
Advice
- Know that it takes much time and skill, don’t expect to be able to do something like mine on your first try.
- If you are attempting something very complex, an acrylic frame is incredibly useful to support your structure.
- Pick an image that is feasible, I generally prefer stylised images (blending colours is extremely impossible).
- If you are skilled in another technique (such as painting), use that one instead - there are a few beautiful painted windows.
- Participate as much as possible.
- Prevent light leaks around the edge of your window, which are such a tiny thing - but ruin the end result.
- Integrating a number can make your window look signifacatly nicer than having a number as a separate window next to it. However, don’t try to do it too much - it is far more complex, gives your far less time to construct your window and makes your window less beautiful if too deeply integrated/hidden.
- Start early, I built the frame in August and started with the card in September. I had decided on the concept around January. The tissue paper was completed by the start of November.
- Finally, be patient.
Any questions, please ask on my Fedi post.
Technically it goes up in a few hours, but I have tested it last night. ↩︎